Home > Create Labels and Print Using Computer > Print Labels Distributed to Multiple Printers to Reduce Printing Time (Windows)
Print Labels Distributed to Multiple Printers to Reduce Printing Time (Windows)
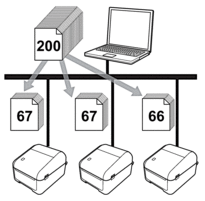
When printing a large number of labels, printing can be distributed among multiple printers, via USB or network connection, to reduce printing time.
- The Distributed Printing function can only be used with printers of the same model number.
- The number of pages is divided among the selected printers. If the specified number of pages cannot be evenly divided among the printers, it is divided in the order of the printers as shown.

- It may not be possible to detect information for a printer connected via a USB hub or print server. Before printing, enter the settings manually, and check if the printer can be used for printing.
- (TD-4420DN/TD-4520DN)
Depending on whether a router is used and the security features in use, such as a firewall, it may not be possible to use this function.
- We recommend performing a connection test for your operating environment. Contact your information technology manager or administrator for assistance.
- In P-touch Editor, click .
- Click Properties.
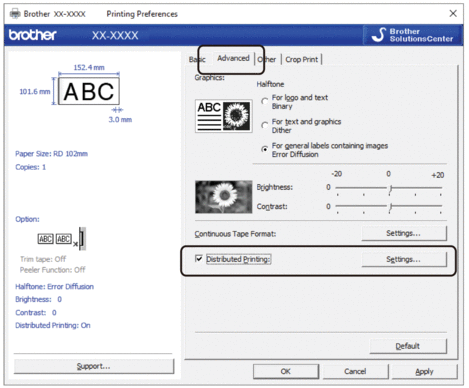
- Click the Advanced tab, select the Distributed Printing check box, and then click Settings.
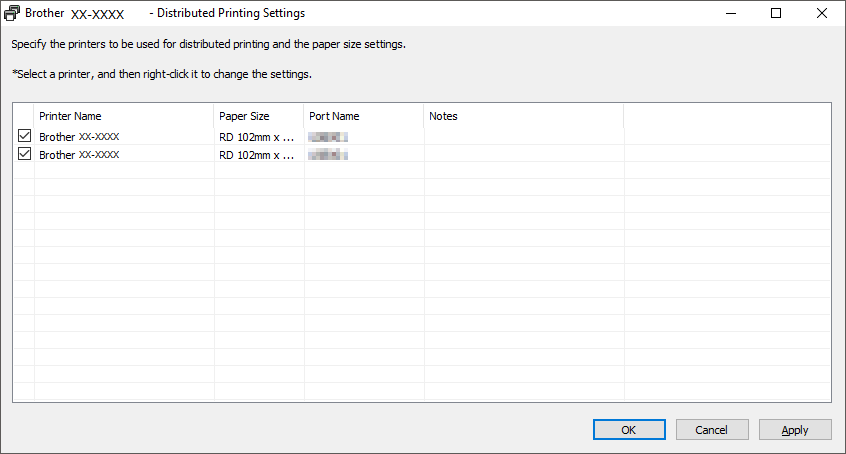
 The Distributed Printing Settings dialog box appears.
 - Select the printers you want to use for distributed printing.

 (TD-4420DN/TD-4520DN)
If multiple printers are connected, you can find the printer you want using its port name. The xxxxxxxxxxxx in BRNxxxxxxxxxxxx in the port name indicates the MAC address/Ethernet address of the printer. The MAC address/Ethernet address can be checked by printing the printer setup information.
- Right-click the selected printer or printers, and then click Settings. From the Paper Size drop-down list, select the label size.If multiple printers have been selected, the same label size setting is applied to all selected printers.
- Click OK to close the label size setting dialog box.
- Click OK to close the Distributed Printing Settings dialog box.The setup is completed.
- Click OK to close the Properties dialog box.
- Start printing.
Did you find the information you needed?


