Home > Transfer Templates to the Printer (P-touch Transfer Manager) (Windows) > Transfer Templates to the Printer Using P-touch Transfer Manager (Windows) > About Transferring Templates from the Computer to the Printer (Windows) > Transfer Templates or Other Data from the Computer to the Printer (Windows)
Transfer Templates or Other Data from the Computer to the Printer (Windows)
To transfer templates from a mobile device to the printer, see Related Topics.
- Connect the printer and the computer using a USB cable, and then turn on the printer.The printer model name appears next to a printer icon in the folder view.
If you select the printer in the folder view, the current templates and other data stored in the printer appear.
 If a printer is disconnected or offline, it does not appear in the folder view.
 - Select the printer you want to transfer the template or other data to.
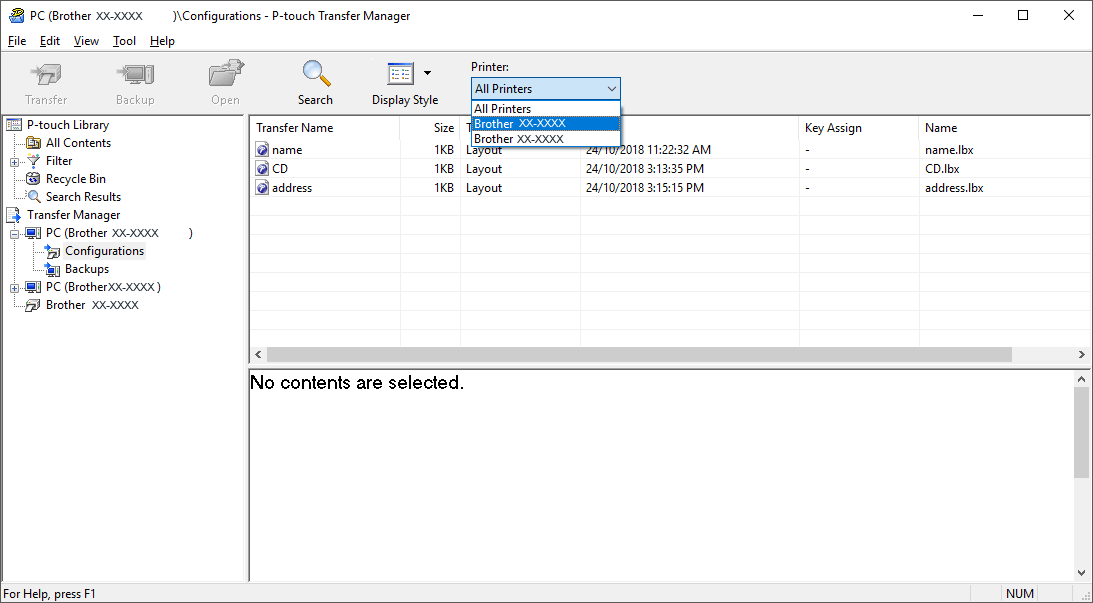
- Right-click the Configurations folder, select New, and then create a new folder.
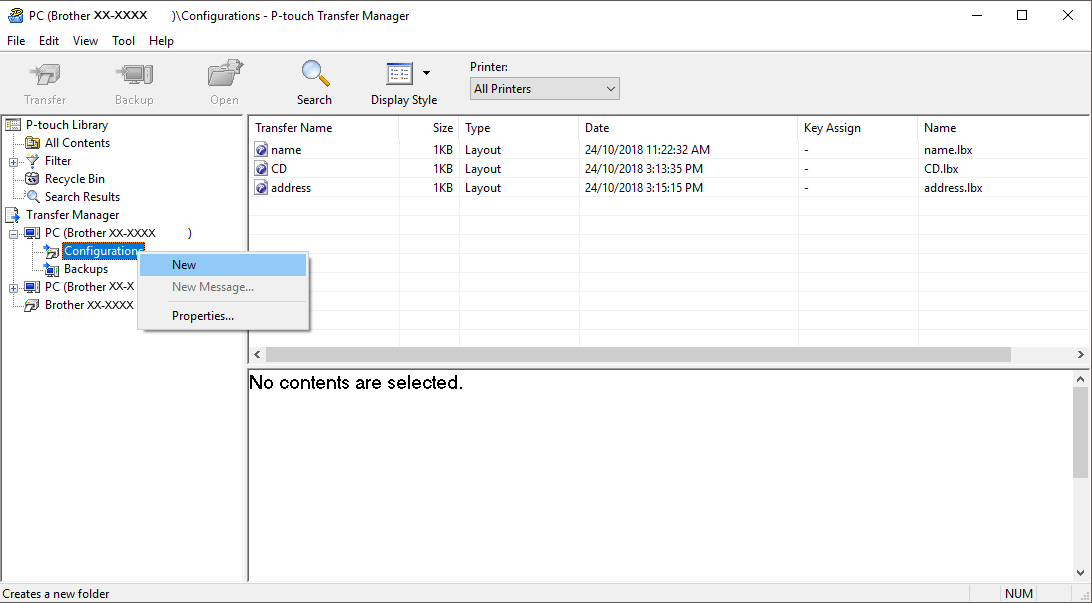
- Do one of the following:
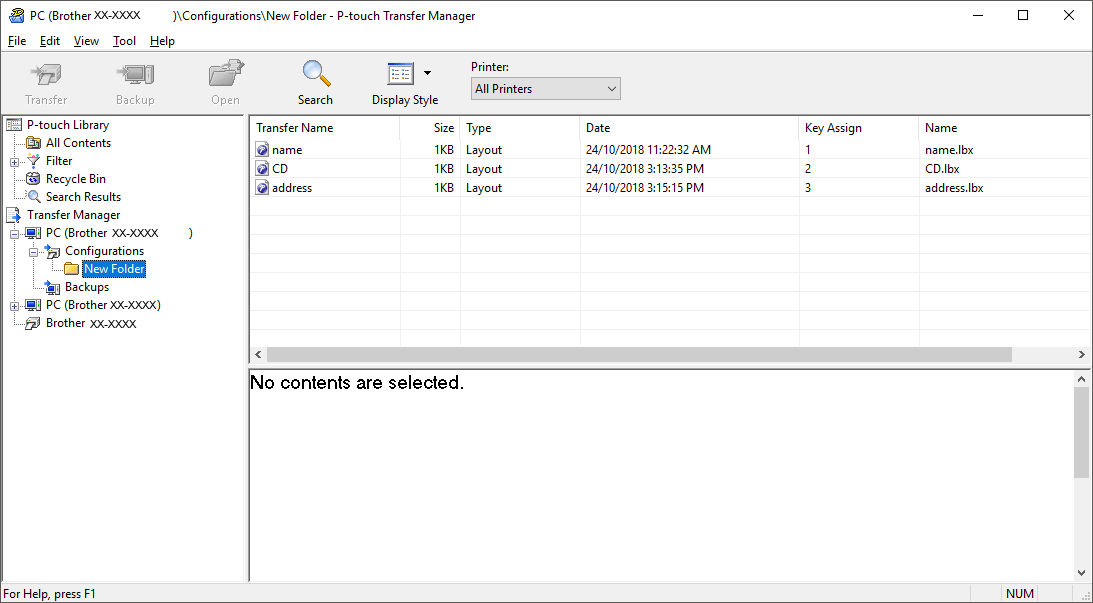
- Drag the template or other data you want to transfer and place it in the new folder.
- To transfer multiple templates or other data, drag the files you want to transfer, and then place them in the new folder. Each file is assigned a Key Assign number (memory location in the printer) when it is placed in the new folder.
Data type Maximum number of transferable items Restriction details Template 255 - Each template can contain a maximum of 255 objects.
- Each object can contain a maximum of seven lines.
Database 20 - Only CSV files can be transferred.
- Each CSV file can contain a maximum of 255 fields and 65000 records.
Image
(User-defined character)
99 - Only BMP files can be transferred.
- Monochrome BMP files are recommended.
- The size limit is 1632 × 1632 pixels. (PJ-822/PJ-862)
- The size limit is 2464 × 2464 pixels. (PJ-823/PJ-863/PJ-883)
- Wide images may be cropped.

- You can confirm the available space in the transfer file memory by printing the configuration report. See Available memory in the report for the available space. The available space appearing in Available memory: ****B may be different from the actual available space.
- You can view the templates and other data by selecting:
- The folder in the Configurations folder
- All Contents
- One of the categories under Filter, such as Layouts
- To change the Key Assign number assigned to an item, right-click the item, select the Key Assign menu, and then select the Key Assign number you want.
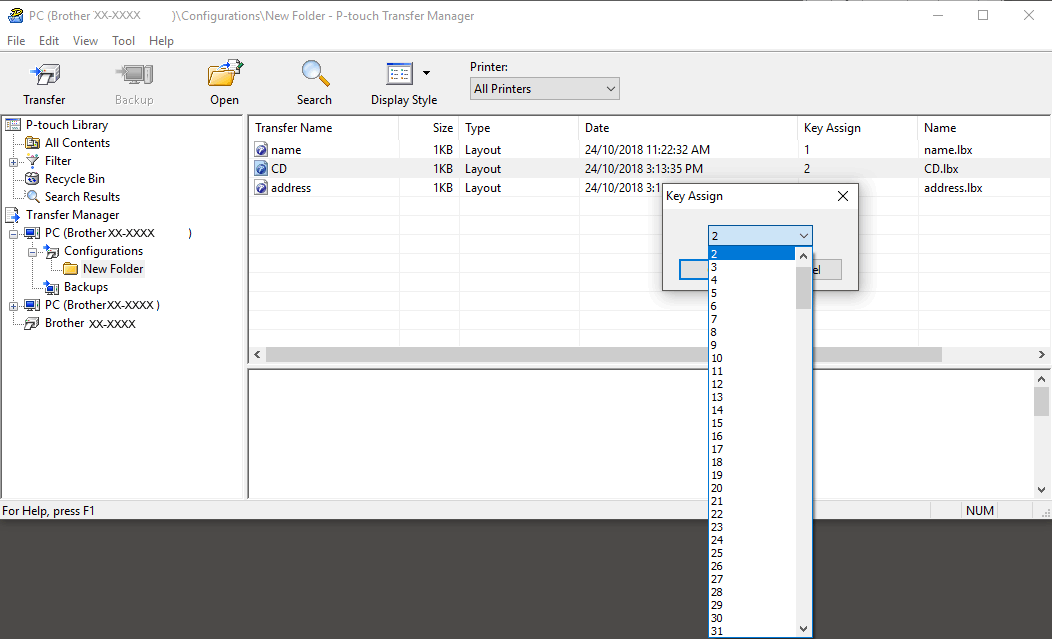

- Except for the data in databases, all data transferred to the printer is assigned a key number.
- If the template or other data transferred to the printer has the same key number as another template already saved in the printer, the new template overwrites the old one. You can confirm the assigned template numbers saved in the printer by backing up the templates or other data.
- If the printer memory is full, remove one or more templates from the printer's memory.
- To change the template names or other data you want to transfer, click the item you want, and then type the new name.The number of characters used for the template names may be limited depending on the printer model.
- Select the folder containing the templates or other data you want to transfer, and then click Transfer.
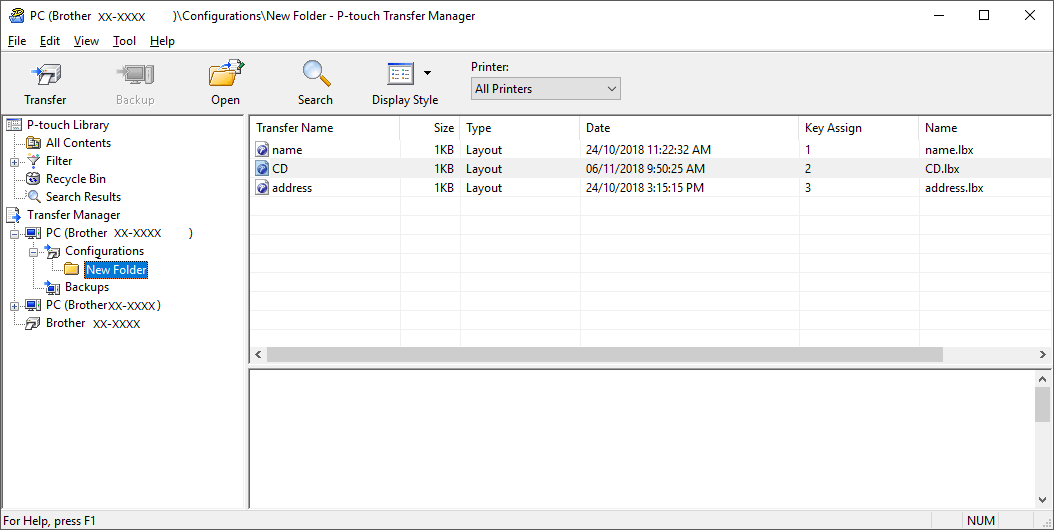
A confirmation message appears.

- You can also transfer individual items to the printer without adding them to a folder. Select the template or other data you want to transfer, and then click Transfer.
- Multiple items and folders can be selected and transferred in one operation.
- Click OK.The selected items are transferred to the printer.
Did you find the information you needed?


